
Learn how to create a Vintage Collage in Photoshop
First, let us explain what is a collage? Collage is a form of art, in which we combine a number of images in a tasteful way. We’ll use some simple techniques to achieve an amazing result. Basically, the key tool of today’s tutorial is our famous “Pen Tool”. So to start with this vintage collage we need these images, background image, girl image, and violin image.Before we start let’s have a look at our Final result:-

Step 1:- Create a new file. Click on File> New with 1200 px width and 975 px height.

Step 2:- Open the nice background image, I’ve mentioned above. And select it using “Marquee Tool” and then click Edit> Copy. And then paste it on our main file.

Step 3:- Now open the woman image. We’ll need to use the “Pen Tool” to roughly select the woman. Once the path is completed, right click on it and click “Make selection”.
 While our girl is selected we’ll have a look at the Select> Modify menu. There are number of options we can use to have the desired result. You can select “Border” if you want it to auto select a boarder for you. Or you can use “smooth” to have softer edges and we also have “Feather” or “Shift+ F6”. The great thing about “feather Tool” is that you can decide how many pixels you want to smooth out to get a proper selection. These options can be really helpful if you are using lots of images to create collage.
 Now right click on it and select “Make selection”.
Step 4:- Now click on Edit> Copy. Then paste it in the middle of our main file.

Step 5:- Now open the violin image. Then click on “Pen Tool” and make a path around the violins.

Step 6:- Once you are done with the path, then Right-click on it and select “Make Selection”.

Step 7:- Now paste it on our main file. Simply click on Edit> Paste. Then select the “Move Tool” and place it on the left side of our girl.
 You need to duplicate the violin layer. You can either do that by right-clicking on the layer and select “Duplicate layer” or press “Ctrl/CMD + J”. Then click on Edit> Transform> Flip Horizontal. And place it on the right side of our girl.
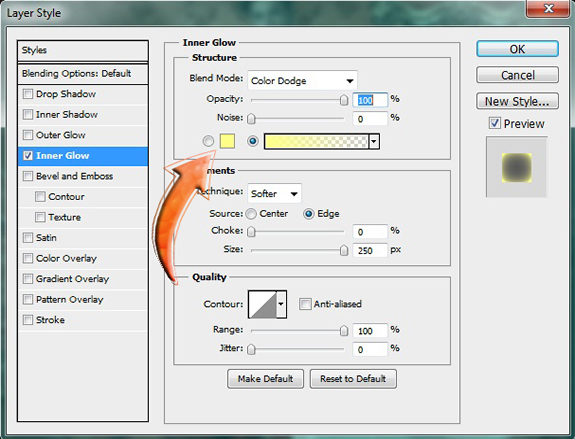
Step 8:- Now, it’s time to create some bulbs. For this click on “Ellipse Tool” and create a small circle and fill it with # ffffff. Then click on Layer> Layer Style> Inner Glow and add inner glow with color # feff88 and blending mode “Color dodge”.
 Now click on Layer >Layer Style> Outer Glow and add outer glow with color # ffde00 blend mode “Linear color dodge”.
  Select the layer and change the blending mode of our bulb layer to “Overlay”. Now we’ll create the string using “pen tool” and “Line Tool” with color # a15c38.
Step 9:- Now duplicate our bulb. For this click on the circle layer while pressing down shift key and then click on the string layer. After that press Ctrl/CMd + E. Now duplicate this layer four times to have four blubs.

Step 10:- Create a circle in the middle using “Elliptical Marquee Tool”. Now change the foreground color to # 4b1d16. Then click on Filter> Render> Clouds.

Step 11:- Now click on Filter> Liquify. Then click on “Twirl Clockwise Tool” and use it on our clouds.
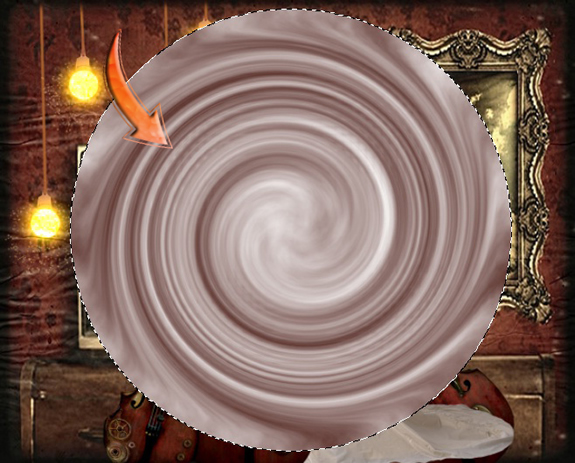 Then click on the cloud layer and change the blending mode to “Soft Light”.
 And now our Vintage collage is done.